
Configuring Various Settings
Picture/Screen Settings
Selecting picture mode
Adjusting various picture settings (e.g. picture brightness/colour)
Setting the screen size/position
Sound Settings
Adjusting various sound settings (e.g. bass/treble/balance)
Setting the sound according to the TV position
Digital Channel Settings
Setting subtitles
Setting audio for digital broadcasts
Tuning digital channels automatically
Tuning digital channels manually
Improving the picture quality of the selected channel
Storing new digital services automatically
Sorting digital channels
Transferring a programme list using a USB device
Tuning satellite channels automatically
Sorting satellite channels
Storing new satellite services automatically
Analogue Channel Settings
Tuning analogue channels automatically
Presetting analogue programmes manually
Changing channels only by 1-digit number buttons
Sorting analogue channels
Editing programme labels
Programme Information & Service Settings
Displaying the analogue programme list
Setting the information banner
Displaying wallpaper for radio broadcasts
Changing over channels automatically
Accessing a pay TV service
Picture Quality
The VA-type LCD panel supplied by Taiwanese vendor AU Optronics (AUO) to Sony this year have been remarkably consistent: once peak white was pegged at 120 cd/m2, native black level on the Bravia KDL42W829B measured 0.042 cd/m2, the EXACT same figure we obtained on the KDL-50W829B and even the step-down KDL-42W705B. Backlight uniformity was very good for an edge-lit LED LCD TV too, with no clouding or corner bleeding in sight once calibrated.
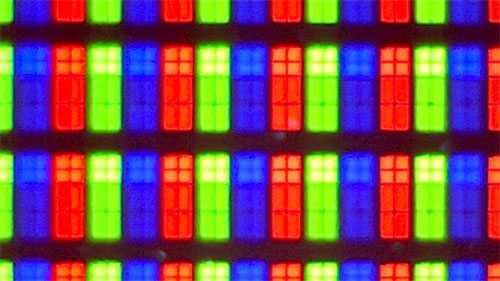 |
| Subpixel structure indicating VA matrix |
As suspected, the KDL42W829’s lower Motionflow XR rating meant that Sony’s motion-compensated frame interpolation (MCFI) control was nowhere to be found in the user menu. There’s one way to increase motion resolution from the LCD baseline of 300 (determined via the horizontally scrolling lines pattern in Chapter 31 of the FPD Benchmark Software test disc) to 1080, and that’s by engaging which activates black frame insertion (BFI). However, the resultant picture was too dim for this feature to be practical: even with and cranked to “Max“, peak light output from our 42W829 sample dropped to a paltry 27 cd/m2 once was switched on.
High-definition images looked detailed and authentic, though colours appeared a touch less lush than what we’re expecting because of the lower gamma and also undersaturated reds. Standard-def processing was decent rather than spectacular, but we don’t foresee many owners complaining about it.
For tri-dimensional viewing, the rare combination of a VA LCD panel and passive 3D on the KDL-42W829B worked wonders, contributing to an engrossing experience that’s rich in depth and contrast (deep blacks plus bright, vibrant colours) yet free of crosstalk (as long as you sit within 15° of eye level vertically) and flicker. As with all passive 3DTV systems, vertical resolution in 3-D mode was effectively halved, so eagle-eyed viewers will observe some softness and jagged edges in extra-dimensional material.
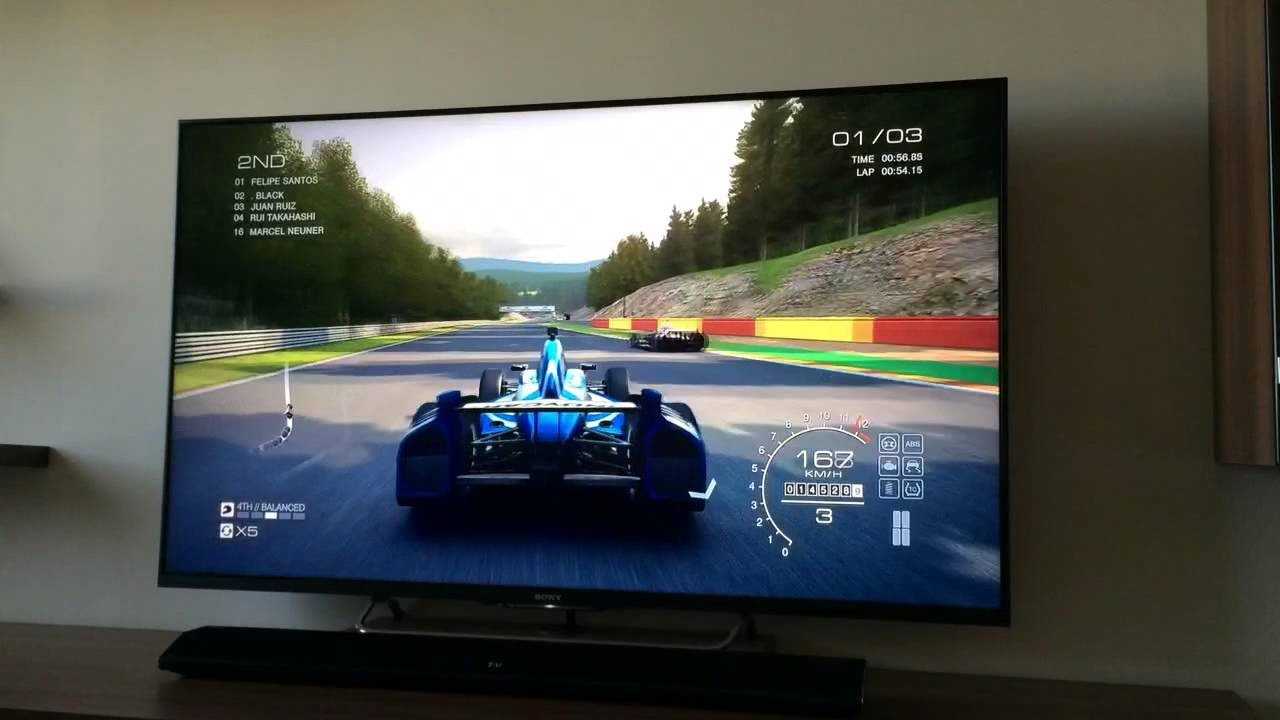
We didn’t manage to get our Leo Bodnar input lag tester working on our Sony KDL42W829BBU review sample (the flashing white boxes simply wouldn’t show up despite multiple attempts), but from our testing the TV was equally as responsive as the larger 50in W8 model both subjectively and objectively (we measured an input lag of 8ms using the traditional cloned monitor/ stopwatch method).
Home Menu Screen
Overview
The Home Menu can be displayed by pressing the HOME button. Categories such as , and are displayed at the top of the Home Menu. You can play back content by selecting its thumbnail in a subcategory. You can also use functions (such as setting change) by selecting its icon. The number of categories and available items vary depending on your region/country.
Steps
1.Press the HOME button.
2.Select the desired category using the / buttons.
\(When using the Touchpad Remote Control, slide left/right.)
3.Press the button, then select the desired subcategory using the / buttons. \(When using the Touchpad Remote Control, slide down, then slide left/right.) \When you move the cursor beyond the left/right edge of the subcategory, the next subcategory is displayed.
4.Select the thumbnail of the desired content. The content is played back.
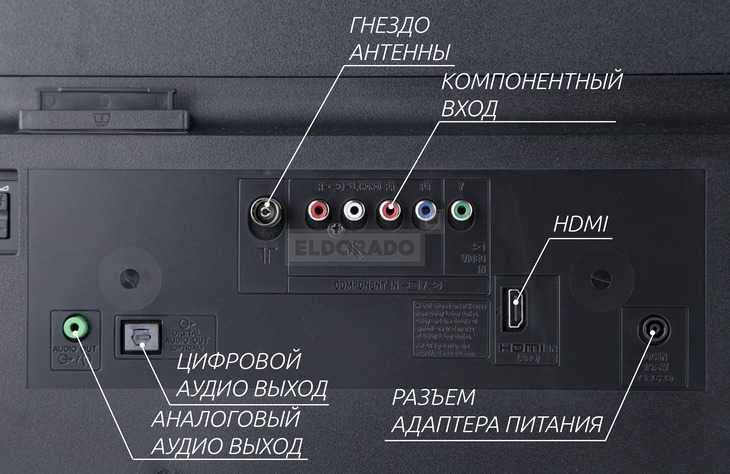
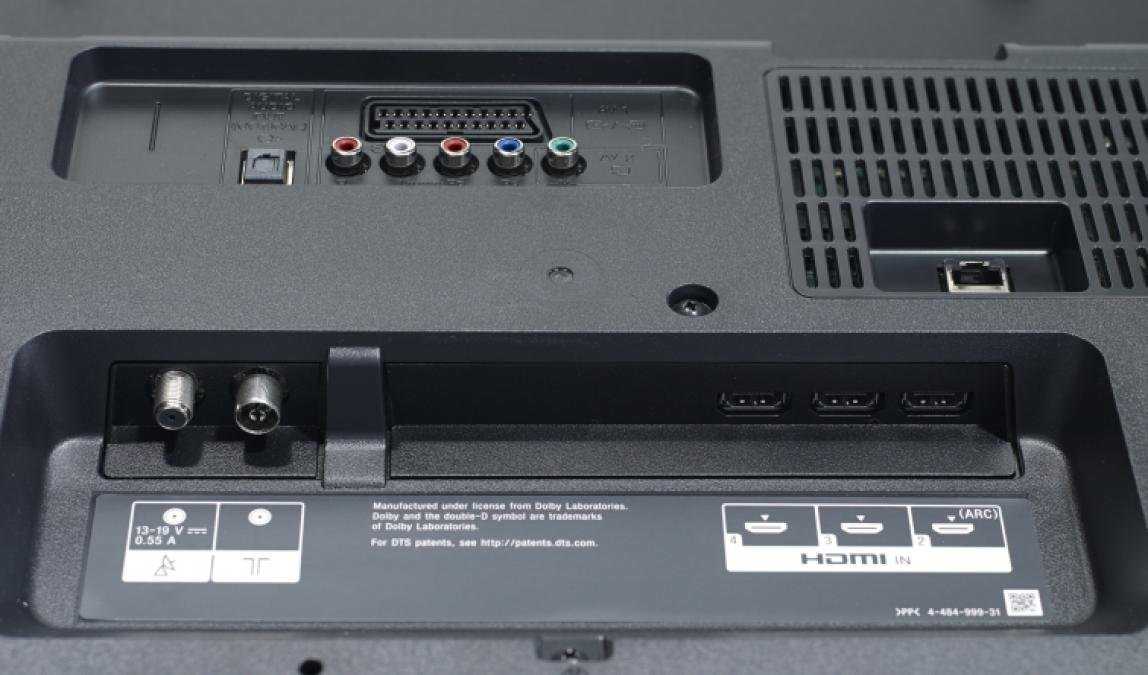
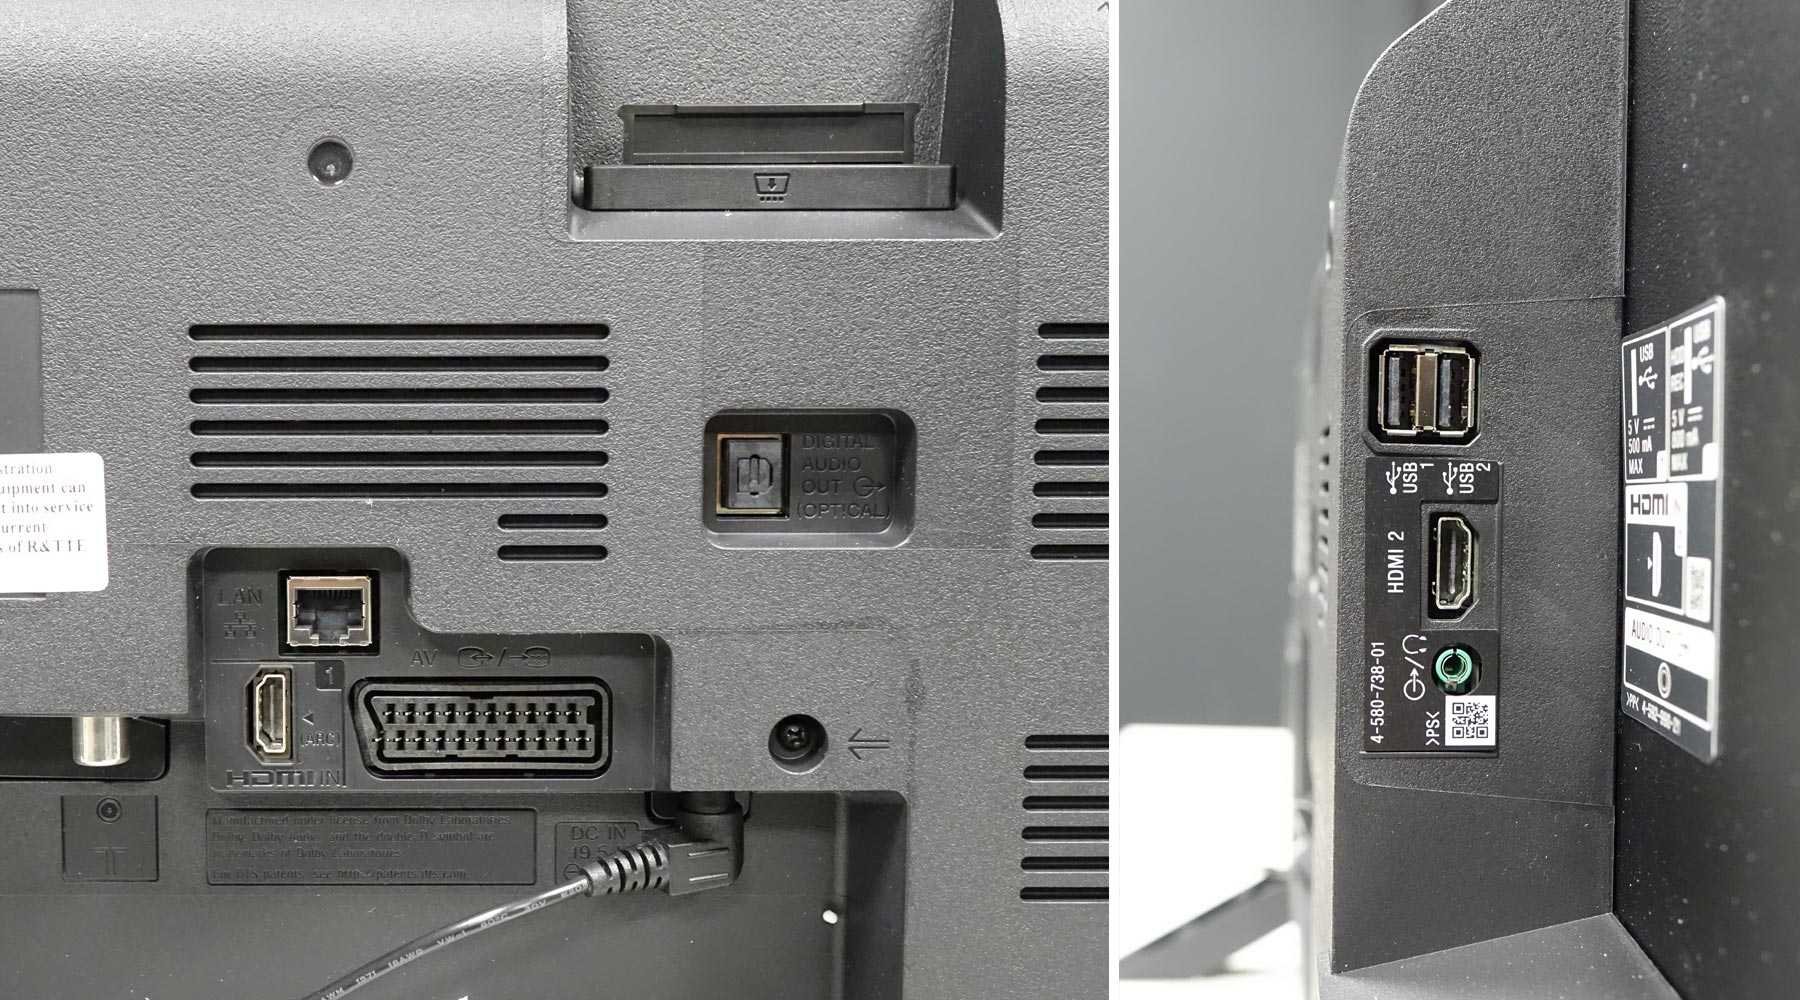
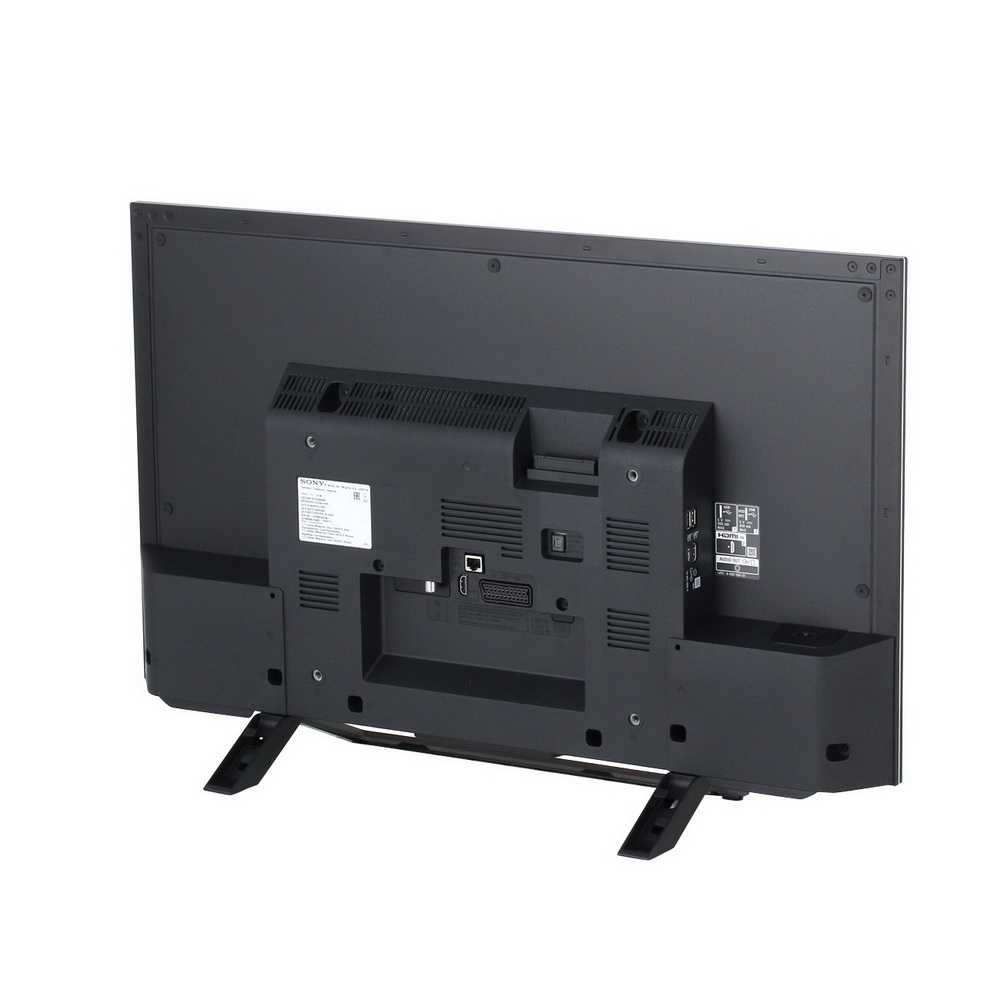
Terminals on the rear (centre)
DC IN 19.5 V
Connects the supplied mains adaptor.
Depending on the model of your TV, it may not be equipped with this jack. In this case, the mains adaptor will also not be supplied.
DIGITAL AUDIO OUT (OPTICAL)
You can listen to the TV’s sound on a connected home theatre system with digital audio input (optical).
AV2, / COMPONENT IN
This input can be used as a composite video input or as a component video input. When connecting a mono device, connect to the L (MONO) audio jack (socket).
For a composite connection, use AV2 for video signals, and also connect to (L/R) of / COMPONENT IN for audio signals.
For a component connection, use Y, PB, PR for video signals, and also connect to
(L/R) for audio signals.
The TV will automatically detect and switch between AV2 and / COMPONENT IN. To manually set the input type, press the HOME button, then select → → [AV2/Component Input].
/ AV1
Connect with a SCART cable. When you connect an analogue decoder, the TV tuner outputs scrambled signals to the decoder, and the decoder unscrambles the signals before outputting them.
The SCART out setting must be made when outputting digital RF on certain models or in certain regions.
\Press the OPTIONS button, then select .
LAN
Connects to an existing network using an Ethernet cable.
CAM (Conditional Access Module)
Selecting Channels
Overview
You can select channels using Discover, the Home Menu, or number buttons.
Selecting channels using Discover
1.Press the DISCOVER button to launch the Discover app.\
(When using the Touchpad Remote Control, touch and slide up your finger from the bottom area.)
2.Select the desired TV broadcast system using the / buttons. (When using the Touchpad Remote Control, flick up/down.)
3.Select the desired thumbnail using the / buttons, then press the button.
(When using the Touchpad Remote Control, slide left/right to highlight the thumbnail, then press the touchpad to select.)
Selecting channels using the Home Menu
1.Press the HOME button.
2.Select at the top of the Home Menu.
3.Select the desired broadcast system using at the bottom of the Home Menu.
4.Select the desired channel.
Selecting channels using the number buttons
1.Press the DIGITAL/ANALOG button to select digital/analogue mode.
2.Press the number button(s) to select a channel.
For channel numbers 10 and above, press the second digit number button quickly after the first digit.
About the information banner
Terminals on the rear (bottom)
RF input that connects to your cable or antenna (aerial).
For satellite-compatible models, a satellite input is also available.
HDMI IN 2/3/4
HDMI (High-Definition Multimedia Interface) provides an uncompressed, all-digital audio/video interface between this TV and an HDMI-equipped audio/video device. In addition, when you connect a BRAVIA Sync-compatible device, communication with the connected device is supported.
Be sure to use an authorised HIGH SPEED HDMI cable bearing the HDMI logo.
If connecting a digital audio system that is compatible with Audio Return Channel (ARC) technology, use HDMI IN 2. If not, an additional connection with DIGITAL AUDIO OUT (OPTICAL) is necessary.
Top of Page
List of
Enjoying Football More
Overview
You can obtain more realistic picture and audio, as though you are watching from the stands of the stadium. You can also view movies and information related to football.
Steps
1. Press the FOOTBALL button.
(When using the Touchpad Remote Control, press the Control Bar ( ), slide the touchpad to highlight the FOOTBALL button, then press the touchpad.)
2.Press the button.
(When using the Touchpad Remote Control, press the touchpad.)
The Live Football Mode is turned on. The roar of the crowd is emphasised, and is set to or .
To turn off the Live Football Mode, press the FOOTBALL button, then press the button.
(When using the Touchpad Remote Control, press the Control Bar ( ), slide the touchpad to highlight the FOOTBALL button, press the touchpad, then press the touchpad again.)
The Live Football Mode is turned off. is restored to its original state.
To view movies and information related to football
Press the FOOTBALL button, then select the desired service (such as ).
(When using the Touchpad Remote Control, press the Control Bar ( ), slide the touchpad to highlight the FOOTBALL button, press the touchpad, slide the touchpad to highlight the desired service, then press the touchpad.)
An Internet connection is required to use this feature. Services may be changed or discontinued without notice.
Top of Page
List of
Contents
Benchmark Test Results
| Dead pixels | None |
| Screen uniformity | Very good for an edge LED TV |
| Overscanning on HDMI | 0% if “Full” & “Full Pixel“ |
| Blacker than black | Passed |
| Calibrated black level (black screen) | LEDs dim down to 0.01 cd/m2 |
| Calibrated black level (ANSI checkerboard) | 0.042 cd/m2 |
| Black level retention | Auto-dimming with full black screen |
| Primary chromaticity | Undersaturated red primary |
| Scaling | Very good |
| Video mode deinterlacing | Decent |
| Film mode deinterlacing | Passed 3:2 cadence over 480i |
| Viewing angle | Good for VA LCD panel |
| Motion resolution | 300 unless engaged (too dim) |
| Digital noise reduction | Optional; effective when engaged |
| Sharpness | Defeatable edge enhancement |
| Luma/Chroma bandwidth (2D Blu-ray) | Full luma; chroma horizontally blurred except in & modes |
| 1080p/24 capability | No telecine judder in 2D or 3D |
| Input lag (high-speed camera) | 8ms compared to lag-free CRT in mode |
| Leo Bodnar input lag tester | N/A |
| Full 4:4:4 reproduction (PC) | Yes, in and modes |
Power Consumption
| Default mode | 32 watts* |
| Calibrated mode | 45 watts |
| Standby | <1 watt |
*Note: Out of the box, was enabled by default, accounting for the lower energy consumption before calibration compared with after.
Finding Contents More Easily (“Discover” Screen)
Overview
You can use Discover to search for content (such as TV programmes, Internet contents, etc.). Contents that appear in Discover vary depending on your model/region/country.
Steps
1.Press the DISCOVER button to launch the Discover app.\
(When using the Touchpad Remote Control, touch and slide up your finger from the bottom area.)
2.Highlight the desired category using the / buttons. (When using the Touchpad Remote Control, flick up/down.)
3.Highlight the desired item using the / buttons, then press the button to select.\ (When using the Touchpad Remote Control, slide left/right to highlight the item, then press the touchpad to select.)
The selected content is displayed.
To change the Discover settings
To change the Discover settings, press the OPTIONS button while Discover is displayed, then select the desired item.
Tips
Some option settings require the TV’s clock to be set.
Top of Page
List of
Adjusting various picture settings (e.g. picture brightness/colour)
Overview
You can adjust various picture settings, such as picture brightness/colour, etc.
Steps
1.Press the HOME button, then select .
2.Select → → the desired option.
Available Options
Applies custom picture settings to the current input or to common memory shared by other inputs. To use the same picture settings for more than one input, select and adjust the picture settings.

Enables selection of a picture mode according to your preference.\
Press the button (or press the touchpad on the Touchpad Remote Control) to jump to “Selecting picture mode” for details.\
Jump to the page
Resets all the settings to the factory settings excluding , and .
Adjusts the brightness of the backlight. Reducing the brightness of the screen will reduce the power consumption.
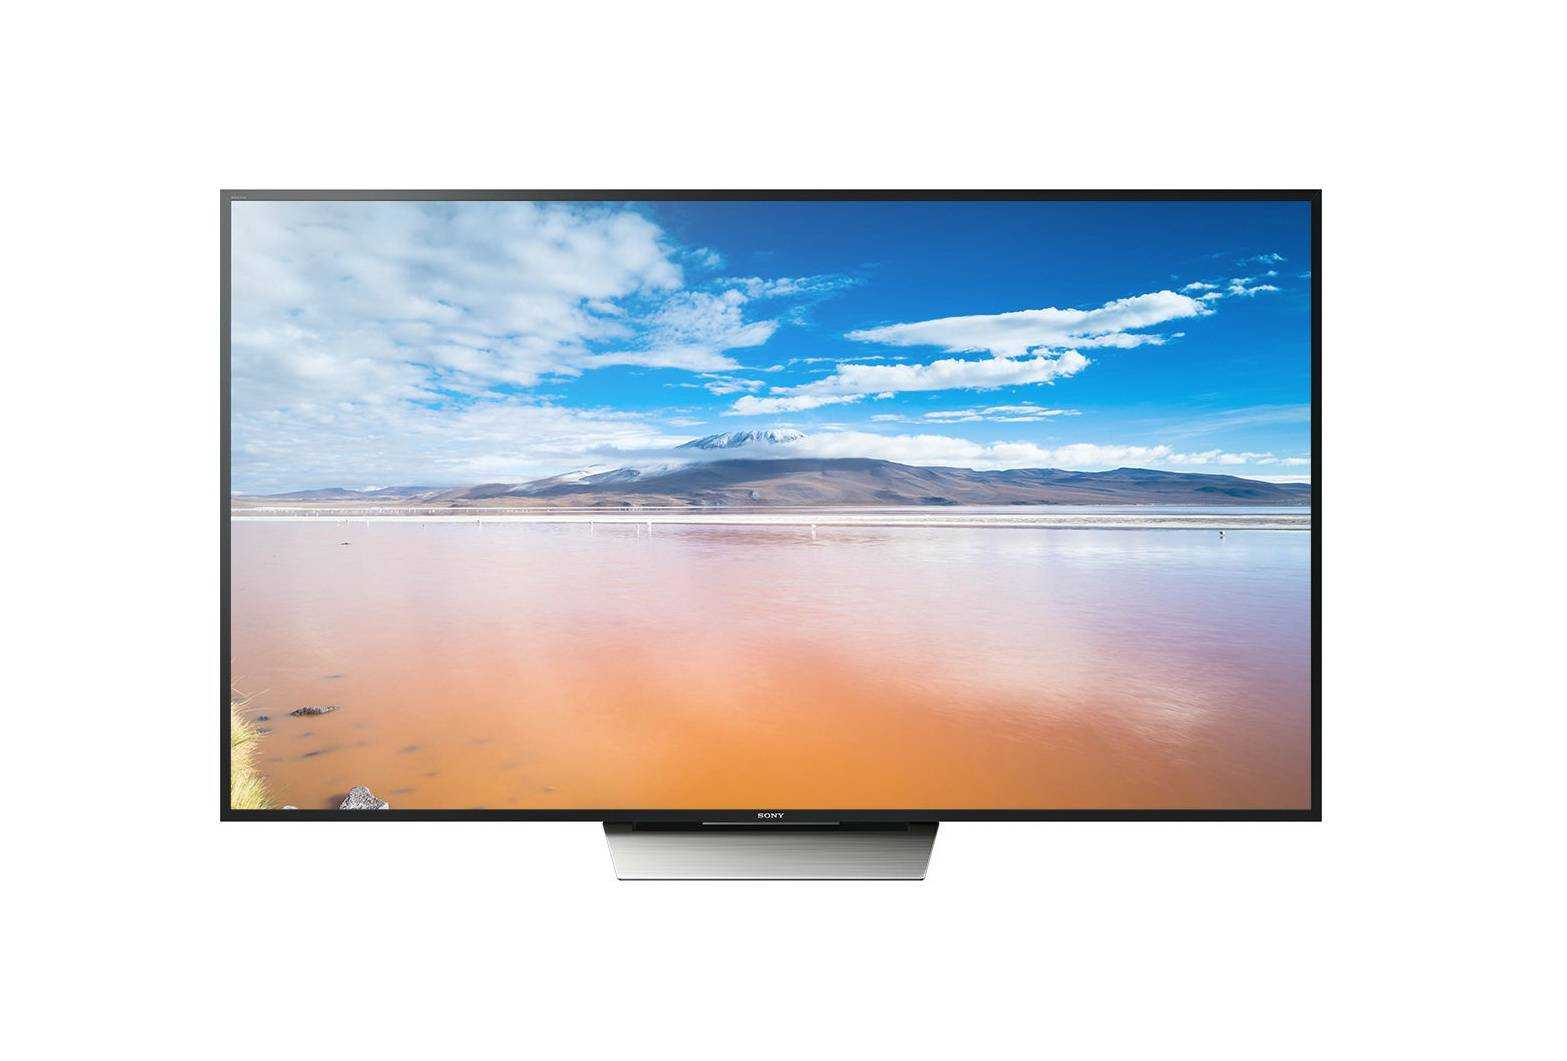
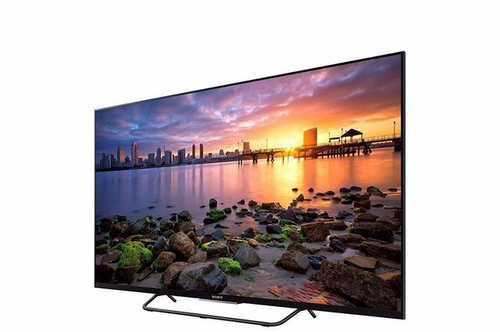
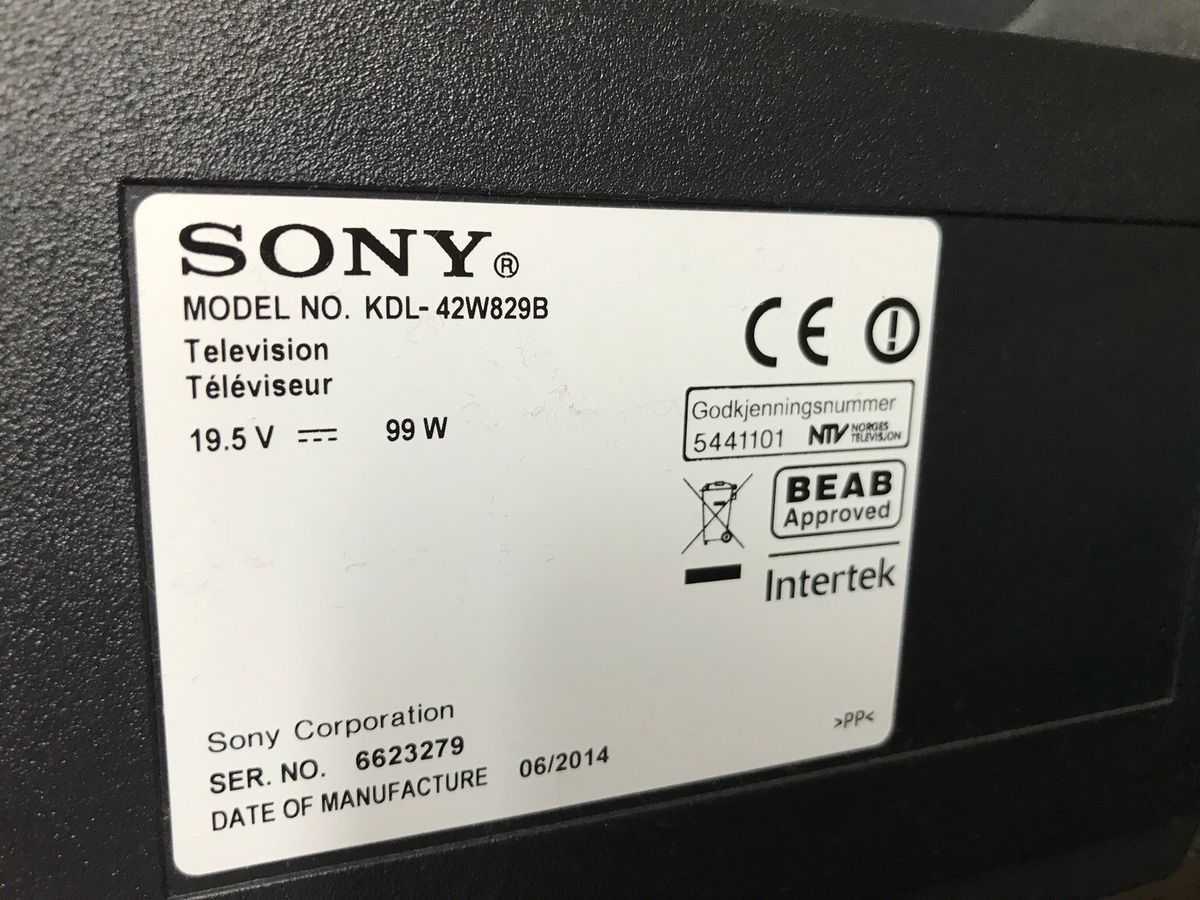
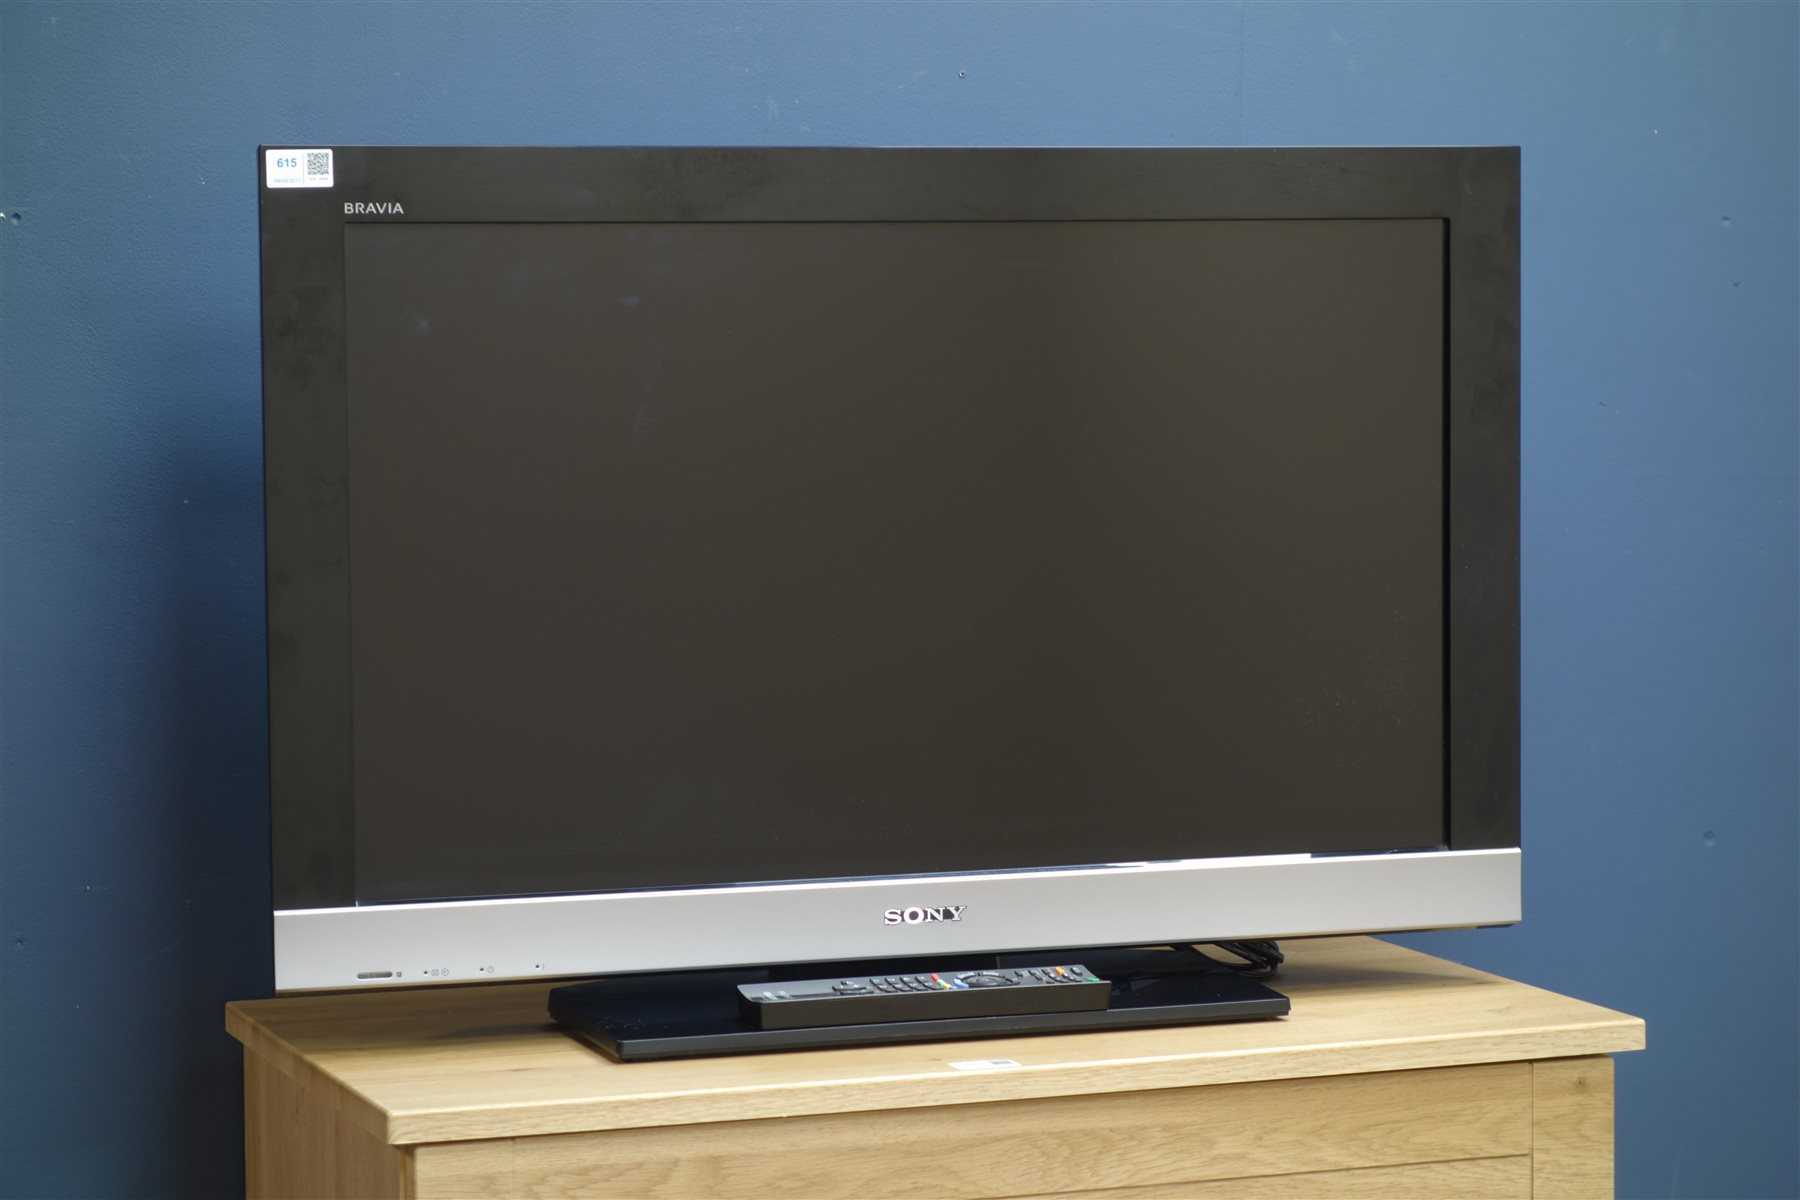
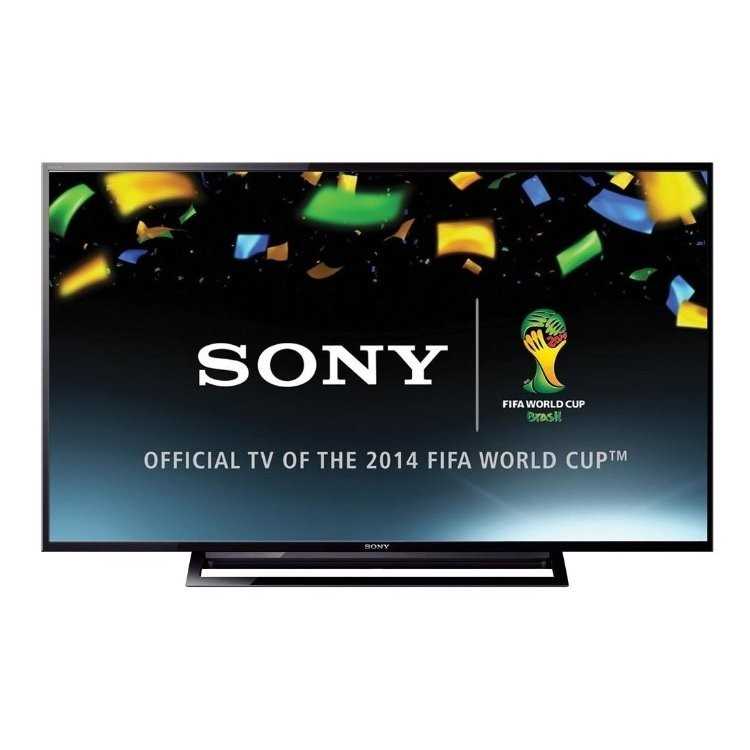
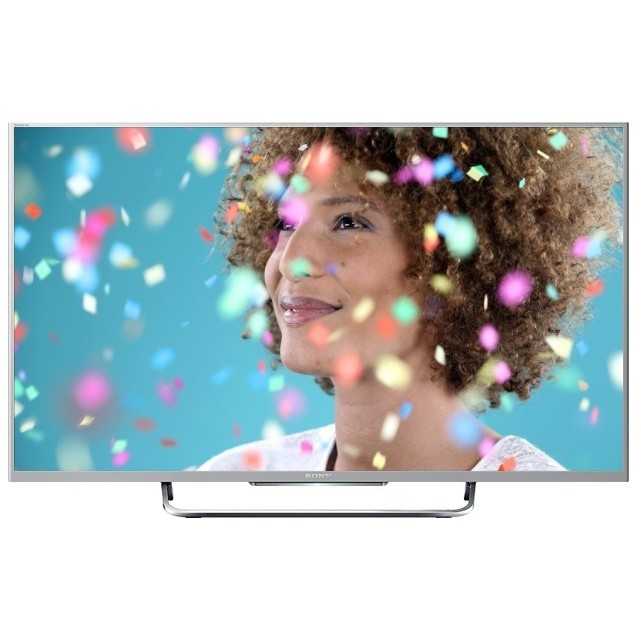
Sony KDL-42W829B 106.7 cm (42″) Full HD Smart TV Wi-Fi Black
The Sony KDL-42W829B TV is a model with a screen diagonal of 106.7 cm, a screen resolution of 1920 x 1080 pixels, an aspect ratio of 16:9, 4 HDMI ports to connect a Blu-ray player, DVD, a game console, etc., 2 USB ports to connect an external hard drive, a Chromecast, a Bluetooth receiver etc., Ethernet port to connect to the internet via cable, internet connection via Wi-Fi, in addition to the rest of the features listed below.
Release date: 2014-05-16.
| Exhibition | |
|---|---|
| Brand | Sony |
| Model | KDL-42W829B |
| Aspect ratio | 16:9 |
| HDMI ports | 4 |
| USB supports | Yes |
| Ethernet sockets | Yes |
| USB ports | 2 |
| Ultra slim TV | No |
| Curved TV | No |
| Size diagonal | 106.7 |
| Resolution | 1920 x 1080 |
| Colour | Black |
| Image formats supported | JPG,MPO,RAW |
| Video formats supported | ASF,AVI,MKV,MOV,MP4,MPEG1,MPEG2,WEBM |
| Audio formats supported | 3GPP,ASF,LPCM,MP3,MP4,WMA |
| No. of speakers | 2 |
| Total speaker output | 16 |
| Internet access | Yes |
| Smart TV | Yes |
| Wi-Fi | Yes |
| Miracast screen mirroring support | Yes |
| Power consumption standby | 0.5 |
| Short description | Sony KDL-42W829B, 106.7 cm (42″), 1920 x 1080 pixels, 3D, Smart TV, Wi-Fi, Black |
| Long description | Sony KDL-42W829B. Display diagonal: 106.7 cm (42″), Display resolution: 1920 x 1080 pixels, HD type: Full HD, Screen shape: Flat. 3D. Smart TV. Motion interpolation frequency: 400 Hz, Motion interpolation technology: Motionflow XR, Native aspect ratio: 16:9. Digital signal format system: DVB-C,DVB-S,DVB-S2,DVB-T,DVB-T2. Wi-Fi, Ethernet LAN. Product colour: Black |
| Handheld remote control: | Yes |
| Energy efficiency class: | A+ |
| HD type: | Full HD () |
| Screen format adjustments: | 14:9, Zoom |
| Screen shape: | Flat |
| Contrast ratio (dynamic): | 1000000:1 |
| Supported graphics resolutions: | 1920 x 1080 (HD 1080) |
| Display resolution: | 1920 x 1080 pixels |
| Supported video modes: | 1080i,1080p,480i,480p,576i,576p,720p |
| Display diagonal (metric): | 106.7 cm |
| Display diagonal: | 106.7 cm (42″) |
| Viewing angle, horizontal: | 178° |
| Viewing angle, vertical: | 178° |
| Native aspect ratio: | 16:9 |
| Motion interpolation technology: | Motionflow XR |
| Motion interpolation frequency: | 400 Hz |
| Audio | |
| Number of speakers: | 2 |
| Audio decoders: | Dolby Digital |
| Audio decoding technologies: | Dolby Digital Plus,Dolby Digital Pulse |
| RMS rated power: | 16 W |
| Audio system: | Nicam/A2 |
| Sound modes: | Movie, Music, Standard |
| TV tuner | |
| Digital signal format system: | DVB-C,DVB-S,DVB-S2,DVB-T,DVB-T2 |
| Auto channel search: | Yes |
| Analog signal format system: | NTSC 3.58,NTSC 4.43,PAL,SECAM |
| Tuner type: | Analog & digital |
| Ports and Interfaces | |
| HDCP: | Yes |
| Ethernet LAN (RJ-45) ports: | 1 |
| PC in (D-Sub): | No |
| DVI port: | No |
| HDMI ports quantity: | 4 () |
| Headphone outputs: | 1 |
| Mobile High-Definition Link (MHL): | Yes |
| Digital audio optical out: | 1 |
| USB 2.0 ports quantity: | 2 () |
| Audio (L/R) in: | 1 |
| Audio Return Channel (ARC): | Yes |
| SCART ports quantity: | 1 |
| CardBus PCMCIA slots quantity: | 1 |
| Common interface Plus (CI+): | Yes |
| Component video (YPbPr/YCbCr) in: | 1 |
| Composite video in: | 1 |
| RF ports quantity: | 1 |
| Energy monitoring | |
| Power consumption (max): | 99 W |
| Power consumption (typical): | 50 W |
| Power consumption (standby): | 0.5 W |
| Weight and measurements | |
| Weight (with stand): | 11.7 kg |
| Weight (without stand): | 10.5 kg |
| Width (with stand): | 958 mm |
| Width (without stand): | 95.8 cm |
| Height (without stand): | 56.3 cm |
| Height (with stand): | 600 mm |
| Depth (with stand): | 170 mm |
| Depth (without stand): | 6.4 cm |
| Connection | |
| Wi-Fi Direct: | Yes |
| Wi-Fi: | Y () |
| Ethernet LAN: | Y () |
| Management Features | |
| Electronic Programme Guide (EPG): | Yes |
| Basic hotel mode: | Yes |
| Sleep timer: | Yes |
| On/Off timer: | Yes |
| On Screen Display (OSD) languages: | Bulgarian, Croatian, Czech, Danish, German, Dutch, English, Spanish, Estonian, Finnish, French, Greek, Hebrew, Hungarian, Italian, Latvian, Lithuanian, Norwegian, Polish, Portuguese, Romanian, Russian, SER, Slovak, Slovenian, Swedish, Turkish, Ukrain |
| On Screen Display (OSD): | Yes |
| Other features | |
| 3D: | Yes |
| Picture-and-Picture: | Yes |
| Digital Living Network Alliance (DLNA) certified: | Yes |
| 3D glasses included: | Yes |
| 3D glasses quantity: | 2 |
| Built-in speaker(s): | Yes |
| Batteries included: | Yes |
| 3D type: | Passive |
| Annual energy consumption: | 69 kWh |
| Energy efficiency class (old): | A+ |
| Design | |
| LED indicators: | Yes |
| VESA mounting: | Y () |
| Product colour: | Black |
| Performance | |
| Audio formats supported: | 3GPP,ASF,LPCM,MP3,MP4,WMA |
| Teletext: | 2000 pages |
| Teletext function: | Yes |
| Ambient light sensor: | Yes |
| USB recording: | Yes |
| Image formats supported: | JPG,MPO,RAW |
| Video formats supported: | ASF,AVI,MKV,MOV,MP4,MPEG1,MPEG2,WEBM |
| 24p support: | Yes |
| Parental control: | Yes |
| Smart TV | |
| Smart TV: | Y () |
| Internet TV: | Yes |
| Smart modes: | Cinema, Game, Personal, Photo, Sports, Standard, Vivid |
| Packaging | |
| Desktop stand: | Yes |
| Cables included: | AC |
| Manual: | Yes |
| Remote control included: | Yes |
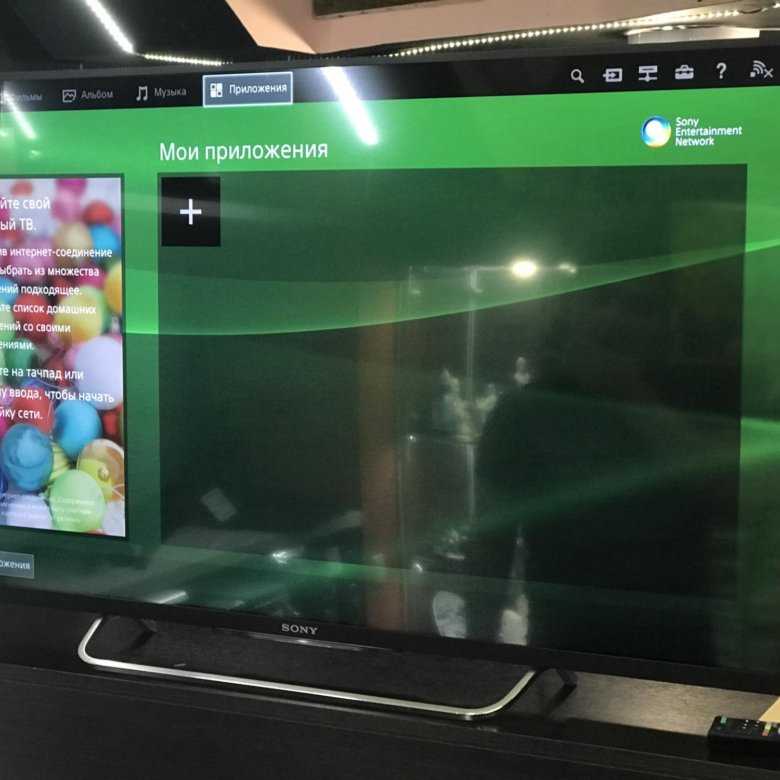
Using Applications
Overview
Press the SEN/APPS button or select from the Home Menu to open the Apps category, which serves as a gateway to Internet content. From this screen, you can access various services and applications. The items on the Apps category differ depending on your region/country, and are subject to change.
Steps
1.Connect to a broadband Internet connection.
Press the button to jump to the title list. Then, press the button again to go to “Connecting to the Internet” for details.
(When using the Touchpad Remote Control, press the touchpad. Then, press the touchpad again to go to “Connecting to the Internet” for details.)
2.Press the SEN/APPS button or select from the Home Menu to open the Apps category.
3.Select the desired thumbnail to run the application.
You can select at the bottom of the Home Menu to view all applications.
Tips
Depending on the service, registration may be required before use.
To add an application to
Select the + icon to view all applications, select the desired application, then select . Or, select at the bottom of the Home Menu to view all applications, select the desired application, then select .
Top of Page
List of
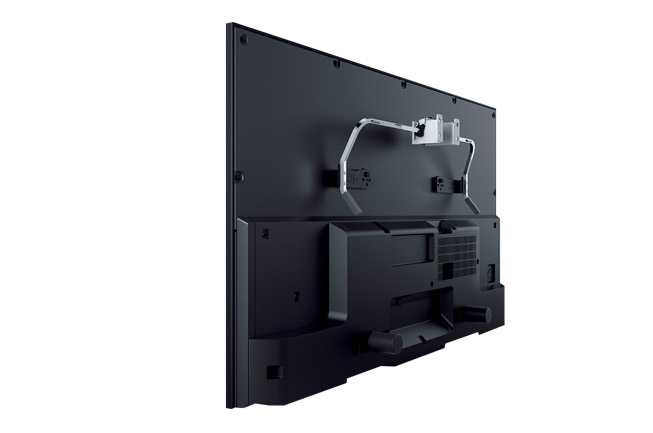
Terminals on the rear (right)
HDMI IN 1/MHL
HDMI (High-Definition Multimedia Interface) provides an uncompressed, all-digital audio/video interface between this TV and an HDMI-equipped audio/video device. You can also connect your MHL (Mobile High-definition Link) device using an MHL cable. In addition, when you connect a BRAVIA Sync-compatible device, communication with the connected device is supported.
Be sure to use an authorised HIGH SPEED HDMI cable bearing the HDMI logo.
If connecting a digital audio system that is compatible with Audio Return Channel (ARC) technology, use HDMI IN 2 on the bottom of the TV. If not, an additional connection with DIGITAL AUDIO OUT (OPTICAL) is necessary.
AUDIO OUT/
Connect your headphones or stereo system to listen to the TV’s sound through the connected equipment.
To listen to the TV’s sound through the connected equipment, press the HOME button, then select → → [Headphone/Audio Out] → or .
When you set in [Headphone/Audio Out], select or , press the HOME button, then select → → .
USB 1 (HDD REC)/2
You can enjoy photo, music and video files stored on a USB device.
\For USB 1 (HDD REC), you can also record a digital broadcast onto an external USB HDD device.
Top of Page
List of
Enjoying a Chat with Your Friends while Watching TV
Overview
Social Viewing allows you to use your social network services while watching content on your TV. Enjoy chatting with your friends and check what others are saying about the show from onscreen comments.
\(Features that can be used with Social Viewing vary depending on your model/region/country.)
Steps
1.Connect to a broadband Internet connection.
Press the button to jump to the title list. Then, press the button again to go to “Connecting to the Internet” for details.
(When using the Touchpad Remote Control, press the touchpad. Then, press the touchpad again to go to “Connecting to the Internet” for details.)
2.Press the SOCIAL VIEW button to start Social Viewing.
The Social Viewing screen appears. (The image size of the programme you are watching is reduced and the tweets area appears.)
3.Press the SOCIAL VIEW button again to open the menu screen, then log in to the desired social network service.
After logging in, your account name is displayed next to the service name in the menu screen.
To stop Social Viewing, while the Social Viewing screen is displayed, press the SOCIAL VIEW button to open the menu screen, then press the SOCIAL VIEW button again.
To view the programme in full screen
Press the SOCIAL VIEW button to open the menu screen, then select → → .
To enter a search keyword
How to Use the i-Manual
Searching for Information
This i-Manual explains how to use the TV’s functions. On the main page of the i-Manual, you can select the desired method to search for information.
Table of Contents: Searches from a title list.
Troubleshooting: Searches for solutions to problems.
Index: Searches by function/feature name.
Select from the // tabs.
Tips
The supplied paper manual contains important information such as cautions and operating instructions to prevent accidents. Read the supplied paper manual thoroughly for safe use.
Steps
Procedure example: “Table of Contents” search
1.In the main page of this manual, highlight the “Table of Contents” tab using the / buttons.\ (When using the Touchpad Remote Control, slide left/right.)


2.Highlight a title on the left of the screen using the / buttons, then press the button to select.
(When using the Touchpad Remote Control, slide up/down to highlight a title, then press the touchpad to select.)
The titles on the right side of the screen change according to the title selected on the left side of the screen.
3.Highlight a title on the right side of the screen using the / buttons, then press the button to select.
Calibration
We calibrated our Sony KDL42W829BBU review unit using our profiled Klein K10-A meter, DVDO AVLab TPG signal generator, and SpectraCal’s CalMAN 5.3 video calibration software.
As per what we normally do on Sony Bravia flat-screen televisions in recent years, we first disabled to prevent the on-screen brightness from being affected by ambient lighting, then set to “Cinema” – the most accurate out-of-the-box picture preset on the KDL-42W829.
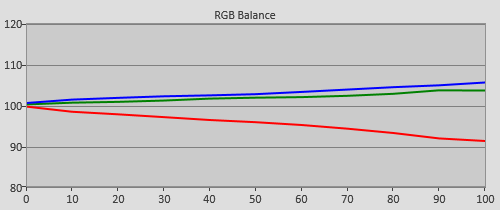
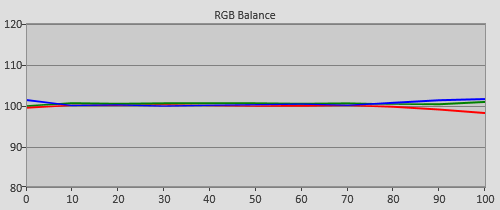
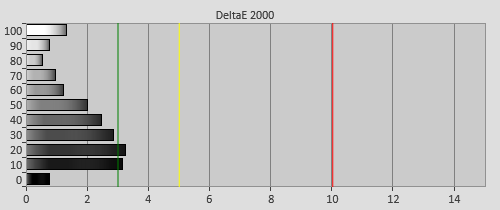
Greyscale
The default of “Warm 2” in mode produced greys that had too little red component, which got progressively worse as the image got brighter.
  |
| Pre-calibration RGB tracking and delta errors (dEs) |
The Sony KDL42W829 comes with two-point controls, which we used to calibrate greyscale to the video and broadcast industry standard of D65.
  |
| Post-calibration RGB tracking and dEs in mode |
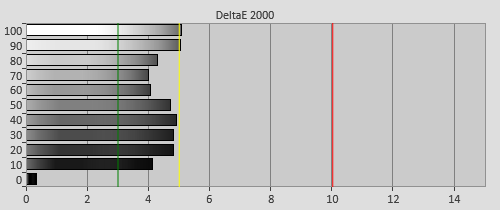
Post-calibration, although delta errors (dEs) were just a smidgen above 3 (the commonly accepted threshold before inaccuracies become visible to the human eye) around 10% and 20% stimulus, these were more a result of skewed gamma than RGB imbalance. Greys appeared neutral, ensuring that the on-screen image will be free of any untoward tint in real-life viewing.
Gamma
We’ve previously praised Sony’s recent TVs for targeting 2.4 gamma in their most accurate picture preset, but for some unknown reason that’s not the case on the Bravia KDL-42W829B whose default setting of “-2” yielded an overall gamma of 2.13.
| Pre-calibration gamma tracking (2.13) | Post-calibration gamma tracking (2.23) |
Dropping to the minimum level of “Min” resulted in an average gamma of 2.23 which was still some way off 2.4, the reference electro-optical transfer function (EOTF) recommended by the International Telecommunications Union (ITU) for flat-panel HDTVs used for studio mastering in a dark room.
Colour
As was the case with the 50″ version, the 42″ Sony W829 featured a slightly compressed colour gamut, with an undersaturated red primary being the most prominent.
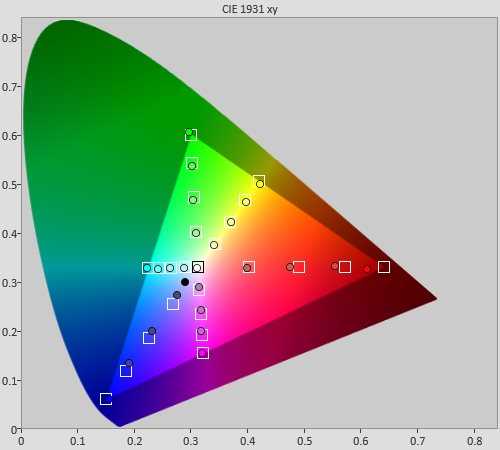 |
| Post-calibration colour saturation tracking |
Since the KDL-42W829 – like all Sony Bravias – doesn’t offer any advanced colour management system (CMS), and the global control affects not only all the primary and secondary colours but also colour decoding, there was little we could do to rectify the inaccuracies.
 |
| Post-calibration colour errors (<3 not appreciable to the eye) |
Front
Sensors and Illumination
Remote control sensor
Receives signals from the remote.
\Point the remote at the Sony logo to operate the TV.
\Do not place anything near the sensor. Doing so may affect its function.
Light sensor
Senses the room light level and adjusts the screen brightness accordingly. \Do not place anything near the sensor. Doing so may affect its function.
Illumination LED
The Illumination LED lights up or blinks in response to remote control operations and lights up in different colours according to the status of the TV.
\Blinking
\(Blinking speed depends on status)
The TV is turned on
\The TV is receiving an incoming call *2 \The TV is in Picture off mode \Software update is in progress
\Blinking
When the TV and a mobile device (e.g. smartphone) are connected wirelessly
\*1
During recording (including SCART REC) or the TV is in pause mode *2
\*1
The following Timer functions are set:
\On Timer, Sleep Timer, Reminder (*2), REC Timer (*2)
For simultaneous conditions, the upper condition in the table has priority.